All the details are important for the creation of the perfect electrical system: for this reason we decided to write an in-depth article on the Vimar Plana 14050 nameplate button and its installation.
Have you recently moved house and chosen to install the Vimar Plana as a civil series? Among all the choices you have had to face, you will certainly have purchased and installed everything needed to create an excellent and satisfactory electrical system, capable of responding to the best possible level of efficiency, perhaps even opting for a home automation electrical system and creating the Smart Home of your dreams.
Once all the work has been completed, however, you cannot neglect the small precautions: you have noticed that your name is missing from the doorbell. A very important detail! And now how will your friends, the postman or even the courier find you? We offer you a simple guide to installing the Vimar Plana nameplate button.
Vimar Plana button with name plate: features and functions
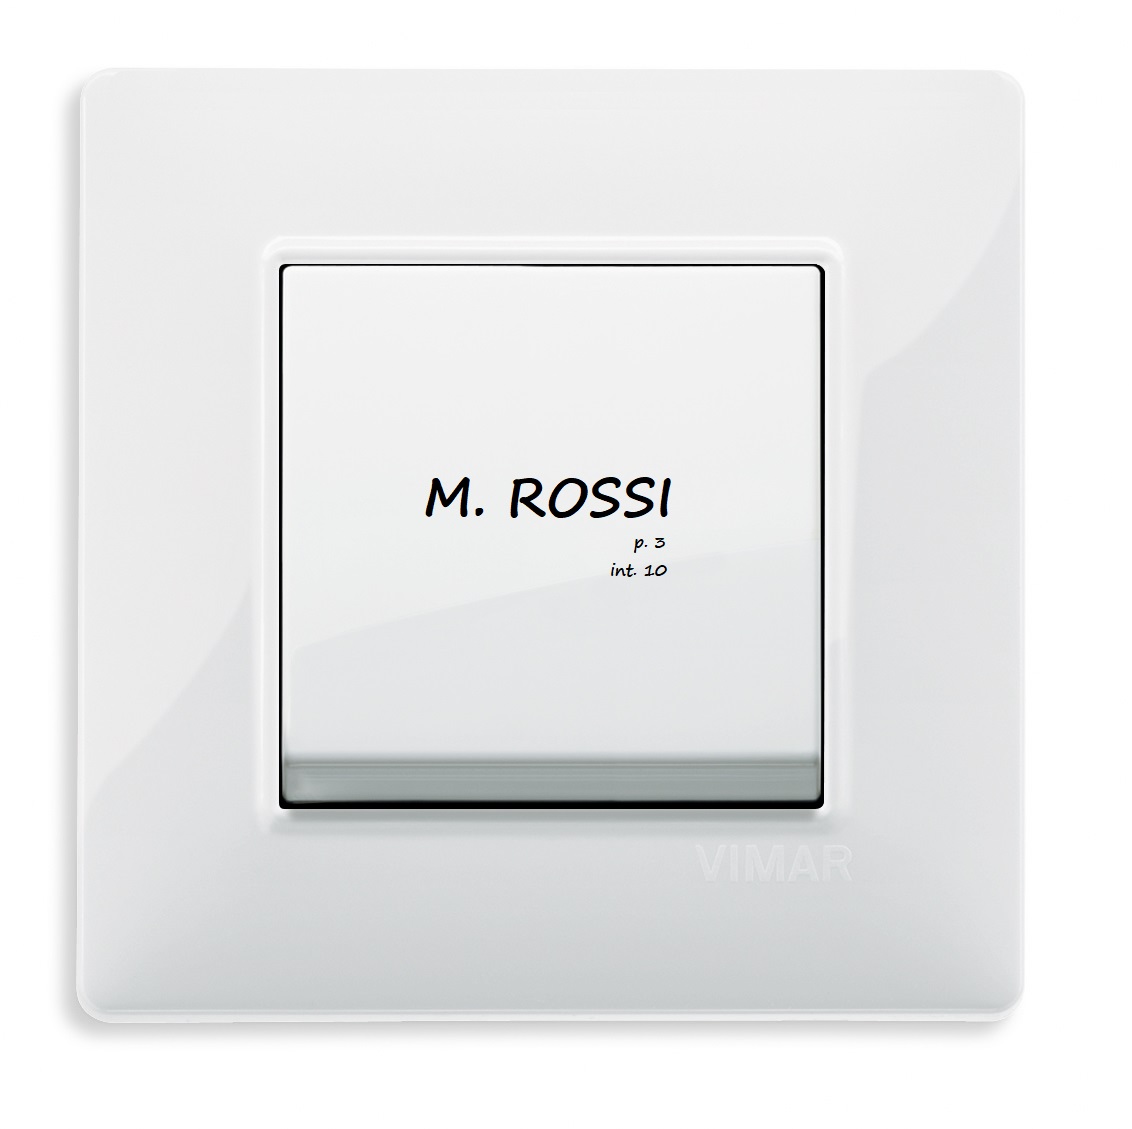 For this reason, Vimar Plana offers, among all the devices and controls, the button with name plate 14050 . This is exactly the command for you. White in colour, it has a simple and geometric design , with defined lines capable of adapting to any living context, from the traditional system to the new home automation systems. The Vimar Plana button with name plate is able to accommodate the screen-printed plate with your name inside it and, occupying two modules of the light point, has a vast space available, in which perhaps you can also add the floor of your apartment and the extension number .
Not only that, but the Vimar Plana nameplate button can also be made bright by installing a bulb with a screw connection inside, more commonly known as a bulb with an E10 connection. This way your name will be even more easily recognizable by anyone.
Now you are surely wondering how to install the button with name plate.
In this short guide I will explain how to install the button in your electrical system, quickly and easily without running into any difficulties.
How do you connect the button with name plate?
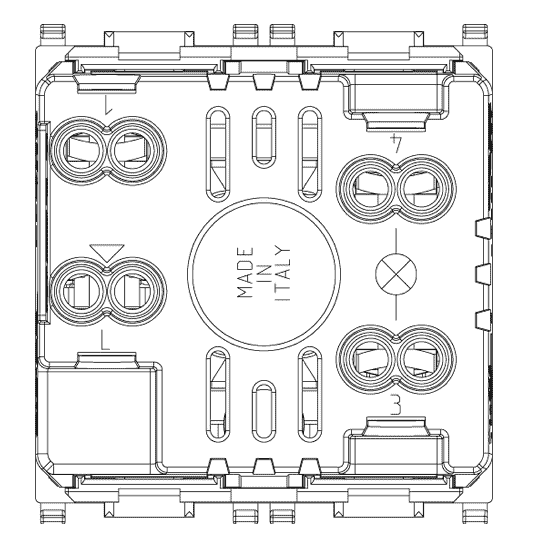
First of all, you will find the symbol on the terminal which identifies L 1-3-4, where L 1 refers to the button, 3 and 4 are the contacts of the light bulb for lighting the name plate.
The button must be hooked onto the support , whose honeycomb structure gives it structural strength.
Once the Vimar Plana button has been installed on your system you can complete the job by writing your name.
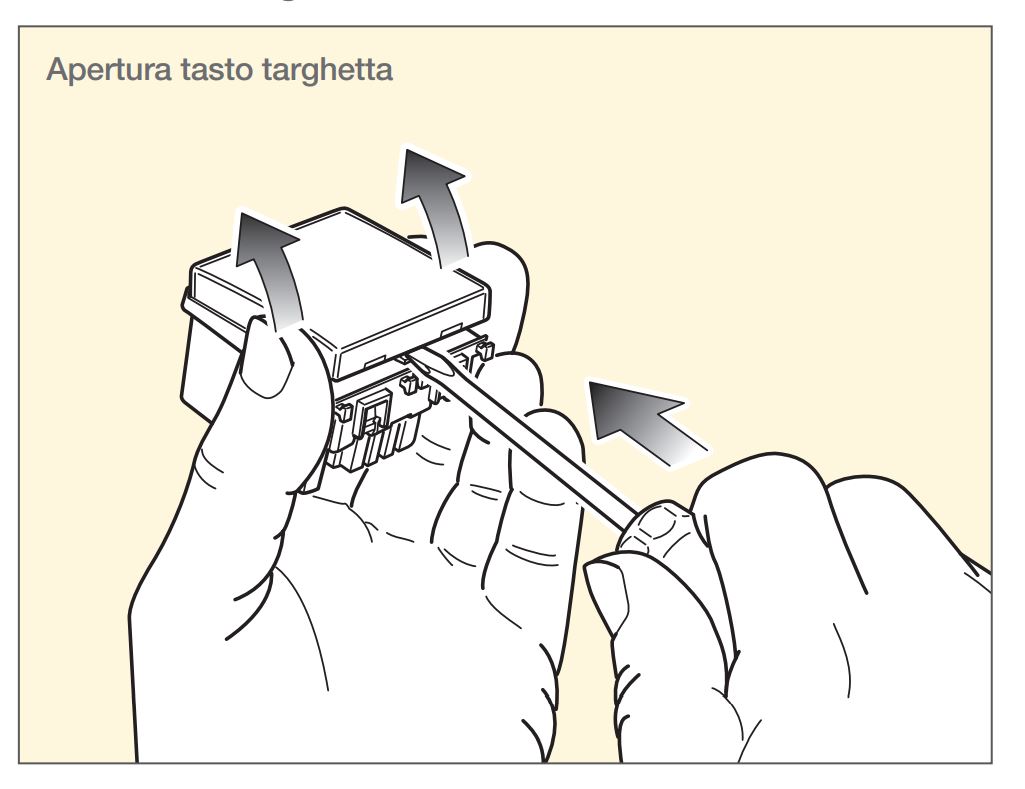
To insert the silk-screened cardboard, simply open the front plate. To do this, you will need a classic screwdriver with a slotted tip which must be inserted between the white tab and the transparent front in the lower part of the button which, by forcing it slightly, will allow the opening of the nameplate button. At this point you have access to the cardboard where you can write your name which will be reinserted between the transparent front and the opaline diffuser which will remain near the lamp. Be careful because it is important to use a light bulb with an E10 socket that is of the right voltage and with a maximum power of 1 Watt as indicated on the side of the name button.
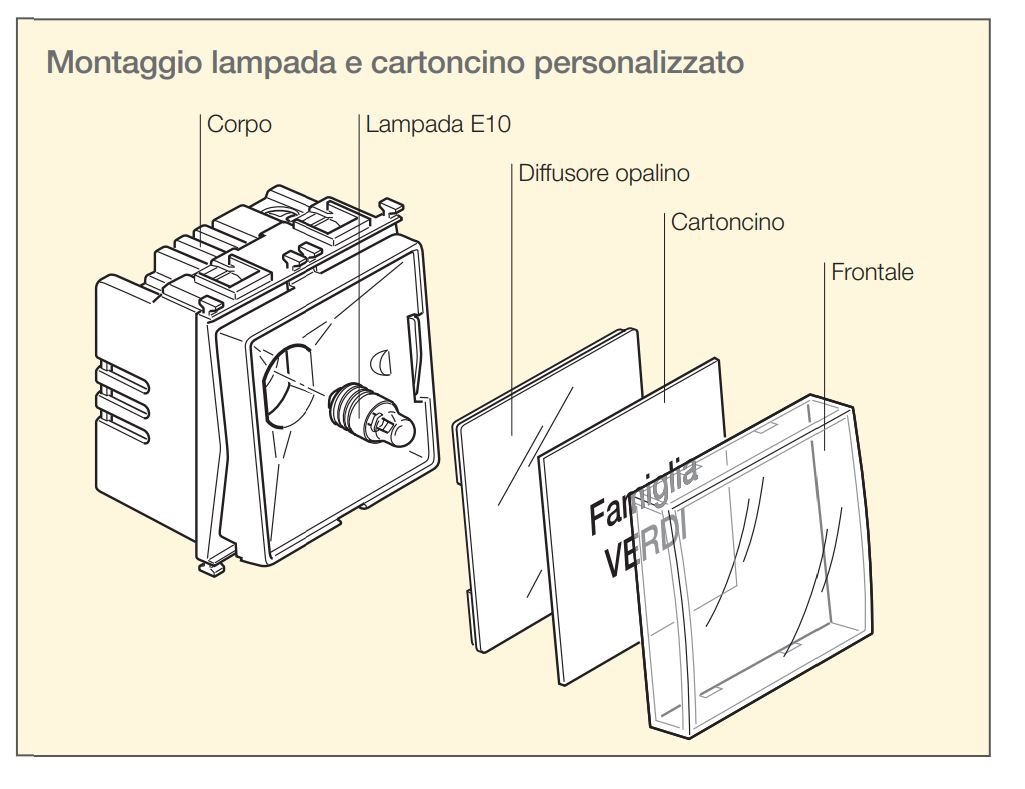
The same procedure must also be done for any replacement of the faulty light bulb . If it is a simple replacement and the bulb had already been previously installed you will find the characteristics on the bulb itself, otherwise you will have to rely on a tester to check the voltage.
At this point you have installed the Vimar Plana 14050 button with name plate in your electrical system, and everyone will know where to find you.

Comments (0)