Shopping Cart
There are no more items in your cart
- HOW TO DO
- 0 likes
- 1757 views
- 0 comments
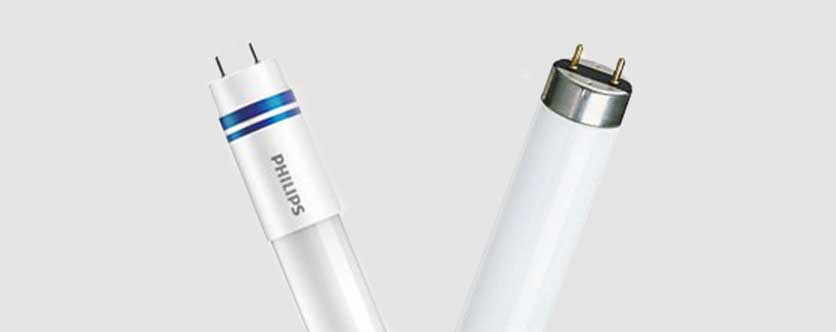
How much do you save by replacing neon with LED?
Energy Saving with LEDs
One of the main reasons in choosing to switch to LED over neon is the significant energy savings . Opting for LEDs can lead to savings of around 70% on energy consumption and also ensures greater longevity of the tubes, whether they are T8 or T5 LEDs.
Additional Costs of Fluorescent Lamps
Fluorescent lamps, in addition to the tube, require a neon starter ballast to operate. Although minimal, this accessory further affects the consumption of the entire lighting system. This impact is particularly relevant in large environments, such as factories, warehouses or shopping centres, where the transition to LEDs can result in substantial energy savings .
Practical example of savings
To understand better, here is a simple comparison:
-
60 watt fluorescent tube + 15 watt ballast = 75 watts total consumption
-
25 watt equivalent LED tube
-
Consumption difference: 75 watts - 25 watts = 50 watts savings per tube
-
Annual savings per LED tube with 8 hours of daily use = €40
Savings on Multiple Units
By installing just ten LED tubes to replace neon, savings can exceed €400 per year , with a benefit of 45 watts of savings every hour of use.
Store Neons as Backup
If your current fixtures are still in good condition, they can be retained as an emergency solution , in case of problems with the new LED tubes.
How to Transform an Installation from Neon to LED in 220V Voltage
Removing the Starter and Preparing for LED Wiring
To begin the neon to LED conversion, it is essential to remove the connection to the starter. This step can be done quickly. When you purchase new LED tubes on Campoelettrico.it, you will find everything you need to proceed: a mounting diagram and detailed instructions for easy connection.
Keep or Remove the Reactor?
The first operation is to disconnect the starter from the ceiling light, allowing you to immediately take advantage of the energy savings of the LEDs. The ballast, whether ferromagnetic or electronic, can be left connected, but this will negatively affect energy savings.
Replacement Options in Case of Damage
- Purchase of a new LED tube ceiling light
- Savings on purchase by opting for LED strips
Installation of LED Tubes with Integrated Starter
For tube models that require a specific LED starter, there will be an indication in the manual with the appropriate connection diagram.
Steps for Using a Ferromagnetic or Conventional Ballast
- Buy LED tubes with starter included (ask advice if necessary)
- Turn off the power supply
- Remove the old fluorescent tubes, rotating them 90°
- Disconnect the starter and remove the ferromagnetic ballast, if present
- Install the LED starter and new LED tube, only if required
Rewiring for Specific Systems
In the case of systems that include an electrical layout with 4xT8 of 18 watts, rewiring will be necessary. However, for InstantFit installations, also suitable for 4 x T8 models, the procedure is more direct with less energy saving as the transformer remains active.
Procedure for Electronic Ballast
- Remove the existing neon tube from its location
- Install the new LED tube
This methodology does not require rewiring if the power supply is different from 220V and if an electronic power supply is in use. If you have a traditional or ferromagnetic ballast, follow the instructions above on starter removal and necessary rewiring, and consider purchasing a Value Standard model for any additional advice.
How to Choose the LED Tube Best Suited to Your Needs
When you need to replace an LED tube, it is essential to consider several variables to make the right choice. First, measure the length of the lighting fixtures already installed or the ceiling light in use. This will help you select the correct size for your application.
Available sizes of LED tubes
- 60 cm (old 18W model replaced by 9W)
- 90cm
- 120 cm (old 36W model replaced by 18W)
- 150 cm (old 58W model replaced by 24W)
Selection of Power and Quality of Materials
For power, the conversion is calculated by the manufacturer to ensure that the light power is equivalent to the old traditional model but with lower consumption, thanks to LED innovations. Furthermore, the choice of materials impacts the quality and durability of your LED tube.
- The cheapest examples are often made of glass.
- Higher quality models are made of aluminum, which ensures better heat dissipation.
As regards the external covering, satin polycarbonate is the preferred material thanks to its ability to distribute light evenly and to be easy to clean.
Important parameters
Another crucial aspect is the power factor, which should be as close to 0.90 as possible, to ensure system efficiency.
Quality Guarantee on Campoelettrico.it
By purchasing on Campoelettrico.it, you will find LED tubes with all the necessary CE and ROHS certifications, as well as construction in high quality materials to ensure reliability and durability over time.
Advantages of LED Technology
- Energy savings of more than 80% compared to fluorescent models.
- Longer life, with more than 10 years of operational life (50-60,000 hours compared to 12,000 for fluorescent tubes).
- Lack of flickering and other unwanted lighting effects.
- Instant on and off without waiting for activation.
- Higher light intensity at the same wattage.
- Zero maintenance interventions necessary.
- No heat emission.
- Absence of UV and IR rays harmful to health.
- Use of non-harmful materials, such as mercury, thus also promoting less environmental pollution.
Main Areas of Use of LED Tubes
- Shopping centers
- Garage and internal parking
- Hospitals
- Cellars
- Residences, offices and companies
By following these tips, you will be able to make an informed choice and benefit fully from LED technology in your spaces.
Comments (0)